
Welcome to the Code Next Curriculum teaser page! Here is a full activity you can do to create your own “Raspimon” - a virtual monster built with a RaspberryPi. No prior coding experience is needed!
Like what you see below? We'll be releasing more curriculum in 2023. Sign up here to get alerts when the curriculum is ready and click here to give us feedback!
Overview: What You Will Learn!
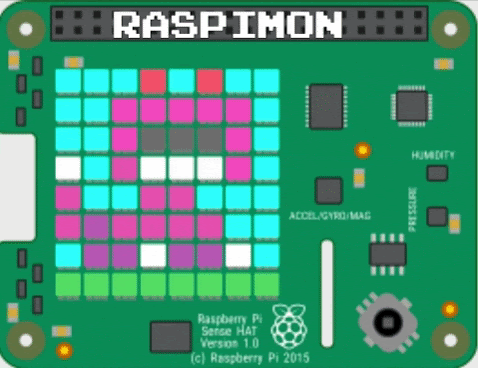
Raspimon is a virtual creature companion you will train using Python! It lives in a Sense HAT-equipped Raspberry Pi 400, and it will be up to you to teach it some tricks.
You will begin by learning how to animate a simple LED matrix Raspimon by programming the Raspberry Pi’s Sense HAT module using Python. You will use your creativity to design and animate your own 8x8 pixel Raspimons and add behaviors, poses, and animations. The activities will walk you through how to teach each skill separately. At the end, you will have the opportunity to put the skills you want into your Final Raspimon.
What sort of skills will you learn?
The Raspimon Academy labs will teach you basic Python and general programming skills, such as working with variables, writing functions, responding to inputs, and making decisions with conditional statements.
You will learn how to read and interpret sensor data using Sense HAT so your Raspimon can react to movement and changes in its environment. What will your Raspimon do when you shake it or flip it upside down?
After you feel comfortable with Sense HAT, you will then begin to explore the world of AI computer vision with a camera attached to the Raspberry Pi. You will teach your Raspimon how to react to your facial gestures, recognize objects like a banana, read text you write, and more.
One of the most important skills you will learn, however, is how to debug and troubleshoot your code. This lets you approach problems like a computer programmer.
All of the activities are meant to be introductory, and we assume you have never had experience coding in Python or other languages. To help you out, we have provided all the starter files you will need on the Raspberry Pi,as well as some solutions to help if you get stuck. However, you should be prepared to be challenged!
For best results
Try the labs in the order they appear. While it is not essential to complete every one, you will find each lab introduces new skills that may help you out in future labs.
Each lab also has example code you can use. Try to type it out yourself instead of relying on copying and pasting so you get used to writing Python code.
Although we provide a lot of information, don’t be afraid to look online for help. as well. The Python and Raspberry Pi communities are vast, and you can find lots of helpful examples to help you debug something or to add a feature we may not have covered in the labs.
Most of all, it’s important to have fun and not to feel discouraged when something doesn’t appear to work out. Errors in our code are often simple but hard to find. Pay close attention to spelling, indentations, and capitalization. If you take an occasional break, the solution will often come to you.
How to get started
First, make sure you have the right equipment for these activities. You should have the following:
- A Raspberry Pi 4 or Raspberry 400 (integrated keyboard)
- A USB keyboard and mouse. Newer bluetooth or wireless options should also work, but not guaranteed
- An HDMI monitor or TV
- A Sense HAT unit
- A USB web camera (for AI Computer Vision activities)
- An Internet connection
- An SD card with the latest version of Raspberry Pi OS (NOTE: Use the 32 GB card we provided. The 16GB is a backup copy and does not contain the necessary files for these activities)
If you have the Raspimon Academy Kit, you have all the necessary components to get started.
Connect all the components as outlined in this quickstart guide, or follow this setup video.
Make sure everything is connected and that the SD card is securely inserted into the Pi. Then connect the Pi to a power source (USB-C). This process will take some time if it is the first time you are setting up the Pi.
Upon first install, your system will setup and you will be guided through some steps, such as:
- Updating the password. If you skip this step, the default password is raspberry. The username is pi.
- A USB keyboard and mouse. Newer bluetooth or wireless options should also work, but not guaranteed
- Choosing a keyboard localization.
- Connecting to a network. You will need your local network password.
- Installing the updates. This process can take a long time, so be prepared to wait up to a few hours depending on your network speed.
Once you get the Pi working, explore it! It comes loaded with software, including games and utilities.
Finally, to get started with the Raspimon Academy, you will need to get all the source files. On Pi, open an Internet browser, which by default is the Chromium browser, and navigate to this address: https://codenext.me/raspimon to find the Github repo for the Raspimon Academy.
In this Github repo you will find the README.md file detailing how to download and use the code and resources. However all the instructions for the activities will be found on this page, starting with Lab 1: Welcome.
Good luck and happy coding!